Photomatix XMP File
For a 15% automatic discount on any Photomatix product, enter the coupon code photoluminary during your order.
XMP files were initially created by Adobe. XMP stands for “Extensible Metadata Platform”. It is a file type that allows for embedding of data about a file, also known as metadata, within the file itself.
When you save a tone mapping preset in Photomatix Pro, it is saved as an XMP file. In addition to the presets which come already installed in Photomatix Pro, it is possible to make your own. This can be very useful as it makes it possible to use the same tone mapping setting on more than one HDR image. Basically, if you process an image with certain settings, you can save those exact settings as a preset, or XMP file.
In order to save your settings as an XMP file, so that you can later apply those settings to another image, you will first need to go through the process of choosing your bracketed exposures, choosing your preprocessing options, and then merging your exposures.
Once you have chosen your preprocessing options and clicked OK, you will arrive at the tone mapping menu. Most likely your image will start out with the default settings within the Details Enhancer tone mapping menu. This can be changed within the “preferences” menu to start tone mapping with your previous settings, rather than with the default settings.
For a detailed explanation of the various tone mapping settings within the Details Enhancer menu, as well as a start to finish walk-through of the creation of an HDR image within Photomatix Pro, please see my HDR tutorial.

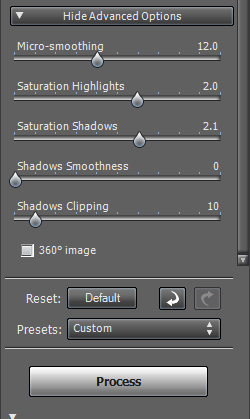
Here are my tone mapping settings for the above image:


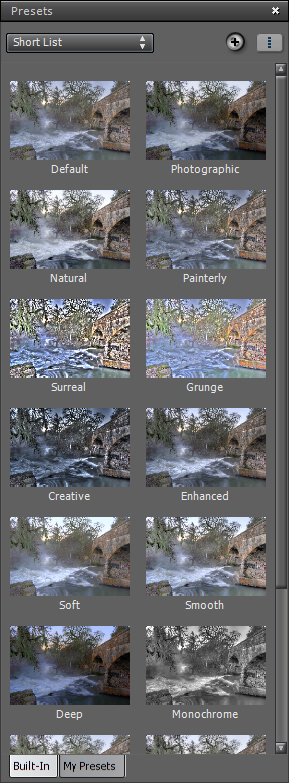
Notice the preset thumbnails at the bottom of the tone mapping screen. This panel can be toggled to appear vertically within the preferences menu. The preset thumbnails panel is new to version 4, and gives you a small preview of results from preinstalled presets as well as presets that you have created and saved. in older versions of Photomatix Pro, it was necessary to apply each preset to the image in order to “try it out”.

Once you have a set of settings that you would like to save as an XMP file for later use, you will first need to choose “Save Settings” under the presets drop-down menu. It is best to save it to the default location so that it will appear under “My Presets” within the Preset Thumbnail panel.
Once you have saved your xmp file, you can then click “Process”, and your setting will be applied to the merged image.
This XMP file , or preset, can now be used to process future HDR images.
Please see my comprehensive Photomatix HDR tutorial!


