Basic Guide to Photographing Landscapes
All too often photographers capture what they feel are stunning landscape photos which reflect the majestic and beautiful scene in front of them. However, it can be a major disappointment to review these photos later and see that they are simply quite dull and unimpressive. This has happened to me many times, although it was practically the rule in the beginning.
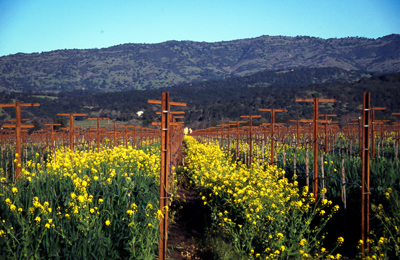
There were a few landscape photos captured early on that were pretty darn good. Here is one that I shot with slide film as a student 9 years ago. It was scanned a few years ago with a super cheap scanner, so a lot of the detail was lost. Still, the scanned version was deemed good enough to be accepted as paid stock on Dreamstime. I feel this image works for compositional reasons like leading lines, rule of thirds, angle of view, and depth. The presence of bright color adds some “pop” to the photograph as well.

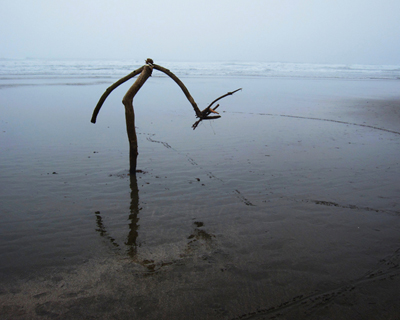
Here is another shot from the first few years of my photography journey that really works. It works for me at least 🙂
This one was taken with a compact point and shoot since I was dirt poor at the time and couldn’t afford a DSLR. I still had a great film SLR but by this point was tired of having to pay for and develop film. I sometimes wasn’t able to take pictures at all for awhile due to lack of money when my only option was film! That was quite distressing at times to say the least. The compact digital camera was the solution at the time, and allowed me to practice a lot.

Let’s go over some tips that will help improve your landscape shots if you are struggling
- Lenses – Your lens choice can have quite an impact on your landscape photography. While it may be tempting to use a wide angle lens to include as much of a scene as possible, many times these photos lack visual impact. They also may start to look like run-of-the-mill landscape photos. No photographer wants to just be “ordinary”! I certainly don’t. I mean, we have all shot ordinary or even bad photos, but my ultimate goal is to walk away from each scene with at least one great photo. While a wide angle lens is certainly the best choice sometimes, experimenting with different lenses can bring surprisingly effective results.
- Camera Orientation – Personally, I have to fight the urge to only shoot landscapes with my camera held horizontally. True, the horizontal orientation emphasizes a wide expanse if that is what you are trying to convey. However, a vertical camera orientation can really enhance the depth of a scene. Sometimes this sense of depth is what is really special about the scene in front of you. In either case, experiment with both orientations to see what you get.
- Light – Harsh midday sun is generally not going to be flattering for any subject, landscapes included. The quality and angle of light just after sunrise and just before sunset is most flattering due to it’s golden hue and side angle. Sidelighting, which spans anywhere from between 45° and 90°, will define and contour elements from the scene and allow them to stand out rather than look flat. To enhance the color in a scene, you can slightly underexpose the scene. It might also be a good idea to set your camera’s white balance to “Daylight” since the camera’s automatic white-balance might try to neutralize the beautiful golden tones.
- Depth – As already mentioned, turning your camera vertical will help enhance depth. However, there are a few other tips that will facilitate an increased impression of depth in a landscape. First, when deciding what to include in your composition, try to include a foreground, middle-ground and background. The more separated these elements appear to be, the more the sense of depth is heightened. Secondly, use a small aperture to keep the entire scene in focus. Third, employ important aspects of the scene, such as branches, architecture or flowers, to create a “frame” around the main subject. This will help to draw the viewers eye to the subject. Finally, look for converging parallel lines. When lines appear to gradually narrow and then meet off in the distance somewhere, the mind interprets this as a clue that they are meeting off in the distance.
- Weather and Atmospheric Conditions – Some photographers think that they can only shoot great landscape photos if the weather is perfect. This is not true however. Fog for example can help you focus on shape and form, rather than small details. Try bracketing shots a bit in the fog since the camera often misinterprets the scene to be lighter than it is. Snow can be a gorgeous element in photos, but like fog your camera will have a hard time with exposure. Again, bracket your shots to find that pristine white or your shots might be disappointingly gray. Rainbows can be beautifully rendered by slightly underexposing to bring out the colors. As in fog and snow, bracket a few shots to be sure to get the best result. One thing to keep in mind is the appearance of the sky. If it is dull and gray definitely don’t make it the focus of your shot. Instead, include little to no sky and focus on the terrain.
- A Few more Tips and Tricks – The use of a tripod isn’t always necessary, but can help you to compose a shot very carefully. It will also allow you to shoot at a very low ISO and shutter speed if desired without any camera shake. Think about what is in your foreground and strive to make it interesting since it will be the part of the scene with the most detail. Always keep your horizon straight, as a crooked horizon is usually the first thing noticed by the viewer of the landscape. It’s always best to get it right in-camera first, but if you have an otherwise beautiful landscape photo with a crooked horizon, it can be fixed easily in Photoshop if it’s not too severe.
 Rachael Towne 2010
 Rachael Towne 2010
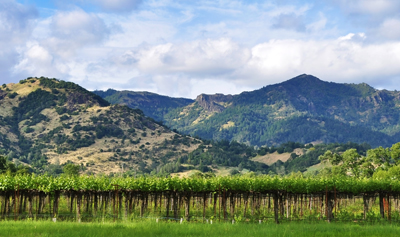
 Rachael Towne 2011
Can you tell I live in wine country?


One Response to Basic Guide to Photographing Landscapes