A Guide to Installing, Creating and Updating Lightroom Presets
Installing Lightroom presets is actually pretty straightforward. First however, if you don’t yet have Lightroom or if you haven’t upgraded to version 4, you can download the trial version from Adobe here:
How to Install Lightroom Presets
Your first step is to open Lightroom and make sure you are in the “Develop” module as shown here. You can click on any of the images in this post to view them larger:
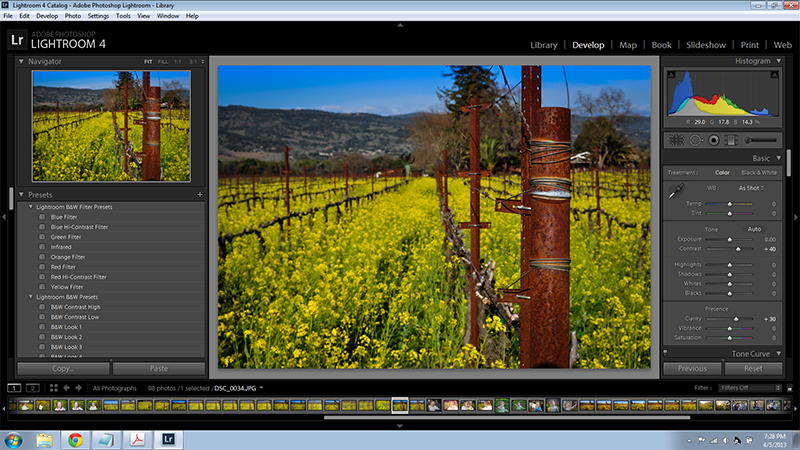 Open Lightroom Screenshot
Next, right-click on “User Presets” and choose “Import” as shown here:
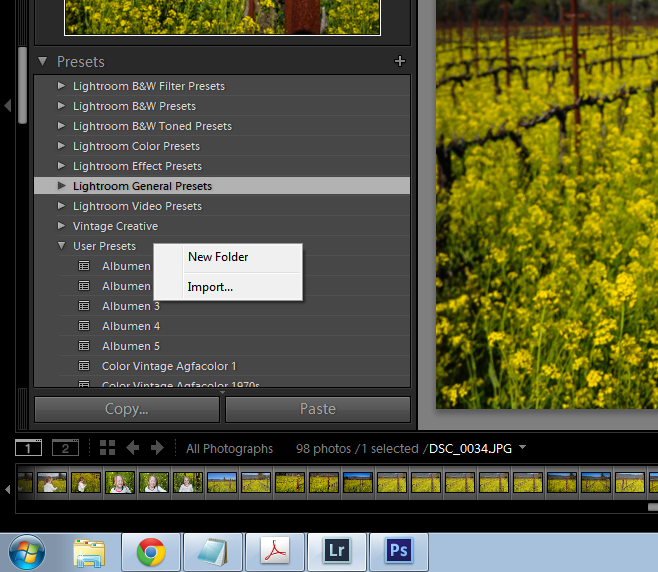 Right Click User Presets
Migrate to wherever you have saved the presets that you would like to install and select them. Then click “Open”. Here is a screenshot:
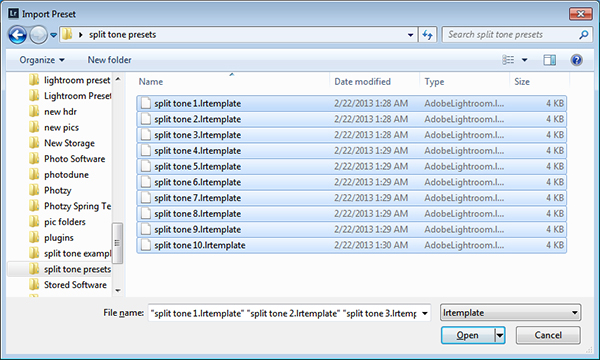 Browse and Then Select Presets
The presets will now be installed and will be visible on the left side of the screen under user presets. You will notice that Lightroom has automatically applied one of them to the image. However, you can simply click the “Reset” button on the lower right side of the screen if it is not the preset you wanted to use right then.
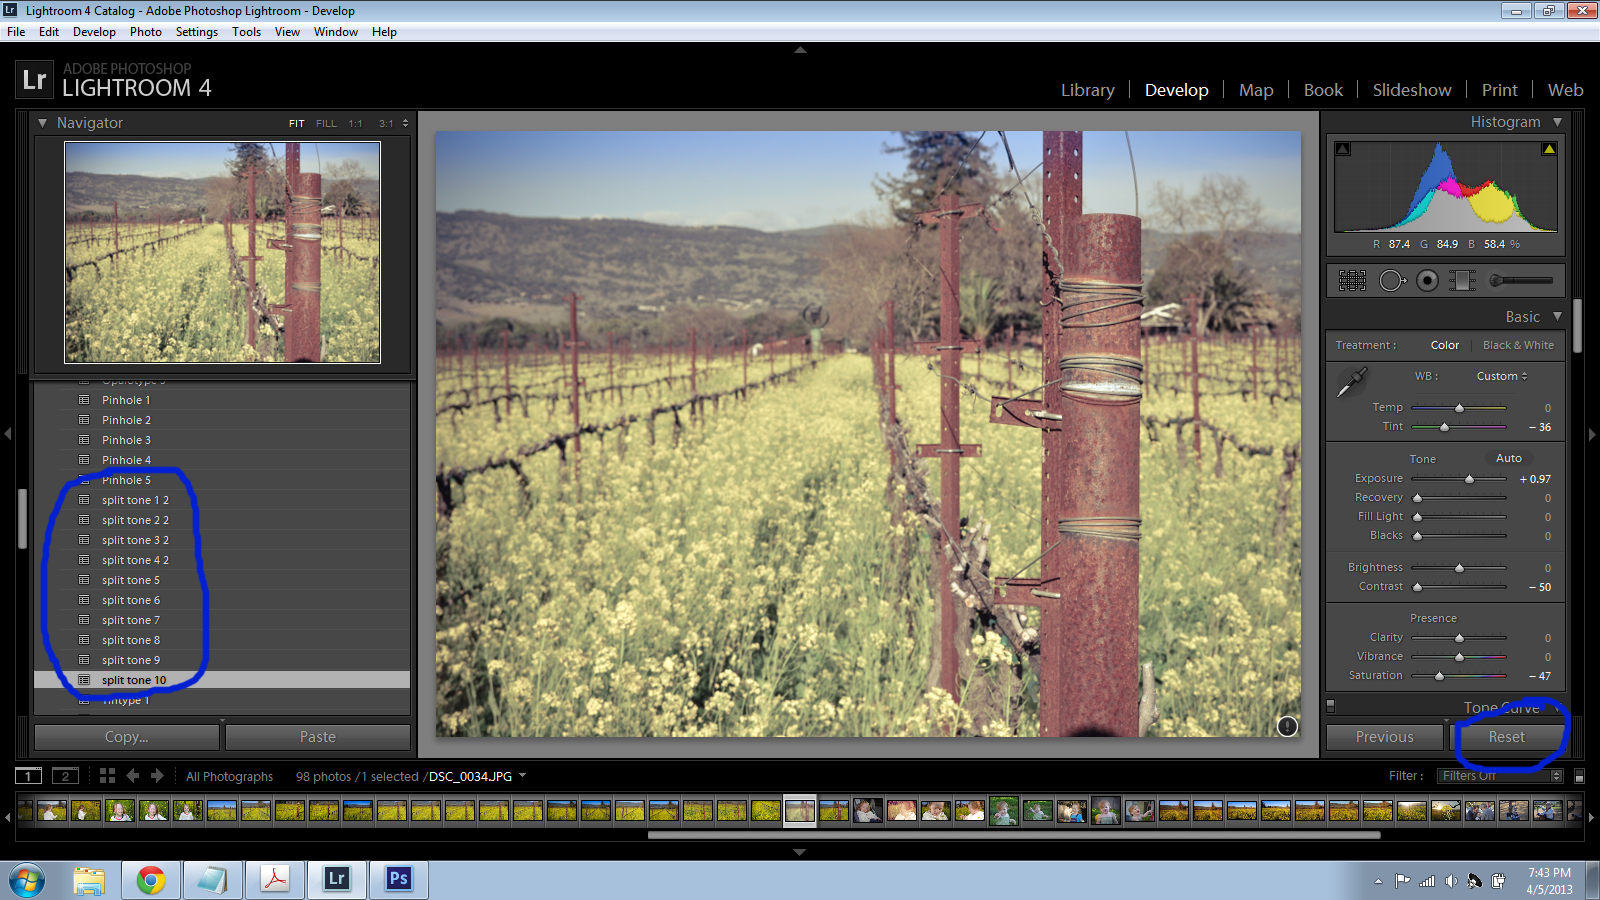 Presets Installed in Lightroom
How to Create and Export Lightroom Presets
Now that you know how to import and install Lightroom presets, let’s go over how to make your own. First, make sure you are still in the “Develop” module. This is the photo I am going to be working on prior to making any adjustments. Although I like it as-is, I’m going to make some adjustments to lighten up the shadows and then save my settings as a preset.
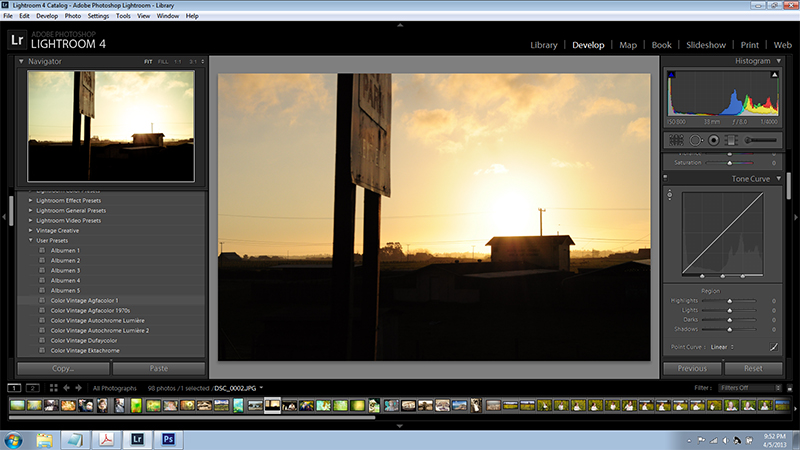 Before Settings Applied
Here is the split-screen option in Lightroom showing before and after settings applied. I’ve lightened up the shadows just a bit but still kept the strongly backlit look.
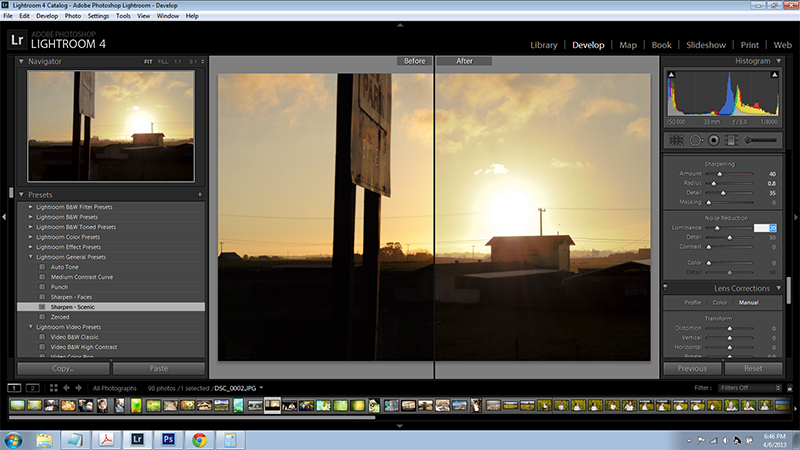 Settings Ready to Save as Preset
Now, since I want to be able to easily apply these same settings to future images, I’m going to create and then export a preset. First, click on the small plus sign on the top of the presets menu (left side of screen while still in the “Develop” module).
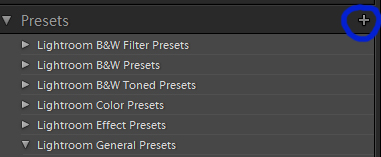 Make New Preset Button
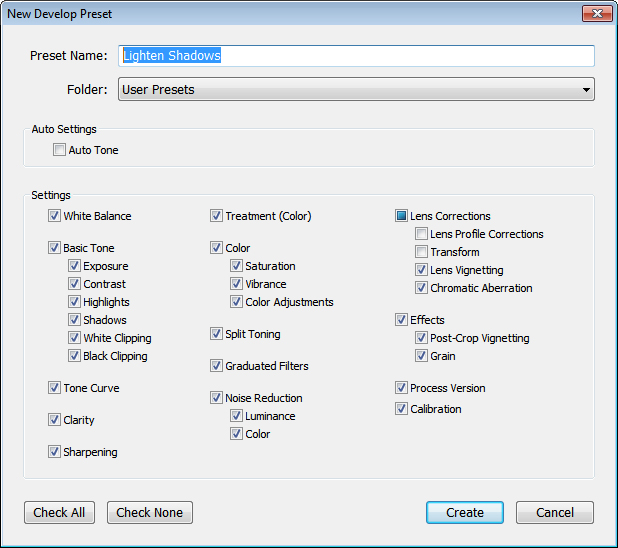
A window will pop up titled “New Develop Preset”. Type in a name for your preset and select a folder (you can create a new folder in the drop-down if desired) to place the preset in. If there are any current settings that you want turned off completely for your new preset then uncheck the boxes. Otherwise, click the “Create” button.
Now the saved preset will appear in the Presets menu within the folder that I chose as seen here:
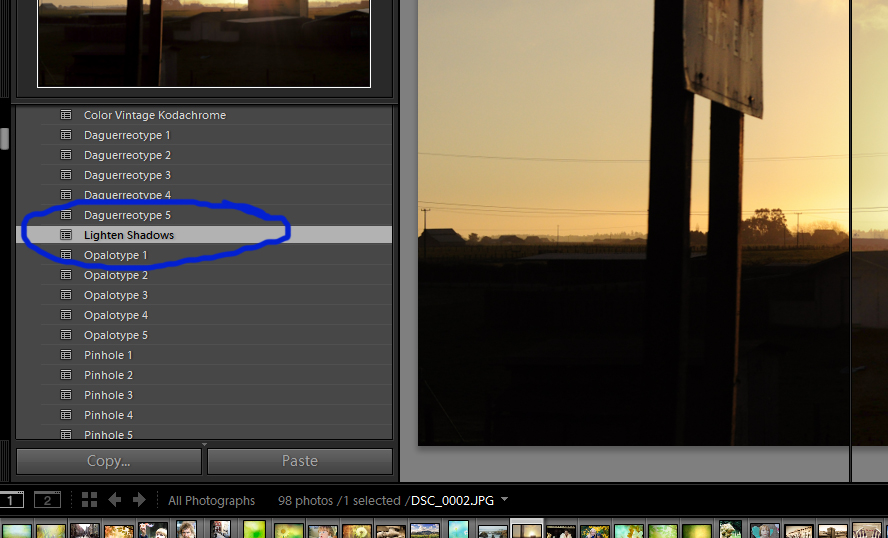 Preset Appears in Menu
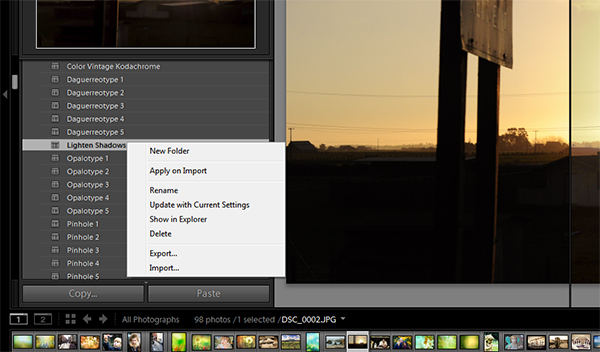
If you want to export the preset and save it outside of Lightroom on your computer, right-click on the preset and then choose “Export”.
You can then browse to where you would like to save the preset on your computer, fill in the file name and click save. Being able to export presets is great if you end up with so many of them in your menu that organization becomes difficult. It’s also necessary if you want to make presets to give away or sell professionally.
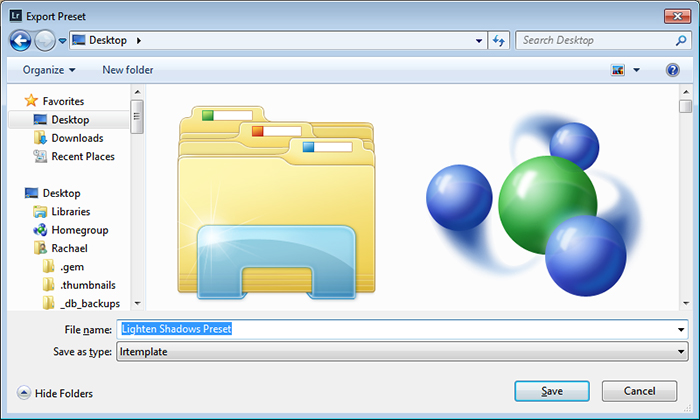 Name and Save Preset
Updating Lightroom Presets
If you later decide that you aren’t quite happy with the preset you originally created, you can always update it. First, apply the preset to a photo and tweak the settings until you are happy with them. You can then right click on the preset and choose “Update with Current Settings”. Now when you use your preset it will apply the new settings to your photos. Remember, if you have previously exported the preset you will need to do this again you want the exported version to reflect the changes you just made.
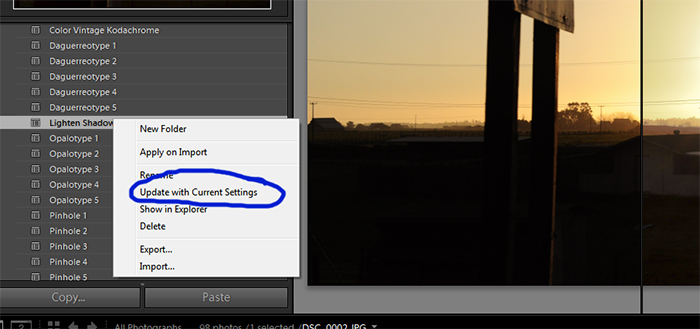 Update with Current Settings