Natural Light Photography
Photography has been described as “painting with light”. The camera is the “brush” and the “light” is the paint. In this post, I will be detailing how to use natural light in your photography.
Personally, I am not a fan of studio photography. I happen to like a certain amount of “reality” in photographs, and the perfect even lighting of a studio shot often strikes me as being very phony and contrived. Whereas, a portrait taken under natural light in front of a window, for example, can be very beautiful and moving. I understand that studio portraiture and lighting have their place, in fashion photography for example, but seem to take all the life out a “real” person’s face and skin.
The lighting information in this article will generally apply to both color and black and white photography, as both require the same settings for proper exposure. However, there may be times when certain lighting conditions “work” better artistically for color photos, but not for black and white, and vice versa.
Anyway, enough about my personal lighting preference. As uttered by the cast of “Monty Python and The Holy Grail”…Get on with it! Strange…this is the second blog post in a few weeks where I felt the need to utter this quote! I must resist the urge next time…
There are four basic characteristics of light that should be considered in photography:
1. Intensity -The intensity of light is the basic strength of the light, or its brightness. It will vary on the level of output from the light source, as well as its distance from the subject. The intensity of light can vary from the flame of a single candle, to the midday sun on a bright summer day.
Changing the aperture and shutter speed settings, will enable you to take photographs in a wide range of natural lighting situations
2. Direction – Light direction refers to where the light is coming from in relation to the placement of subject and camera. A single light source will be observed as being clearly defined with obvious direction, whereas multiple light sources will create diffused lighting, and the direction will likely not be discernible.
There are four basic light directions:
- Front
- Side (both 45° and 90°)
- Back
- Top
Front lighting comes from directly behind the camera toward the subject. Often amateur photographers are told to “shoot with the sun behind you”. This advice will result in all parts of the subject getting direct light, which creates a shadowless image with few tonal gradations. However, shadows are very important as they emphasize depth, form and contour. Front lighting is often referred to as “flat lighting” due to the lack of shadows and low tonal gradation.
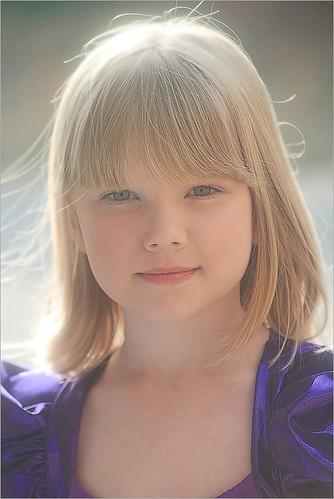
One benefit of the lack of shadows which result from front lighting, is the minimization of wrinkles. So, front lighting can be used to take a flattering portrait of an older person…unless the direct light causes the subject to squint, which is definitely not flattering.
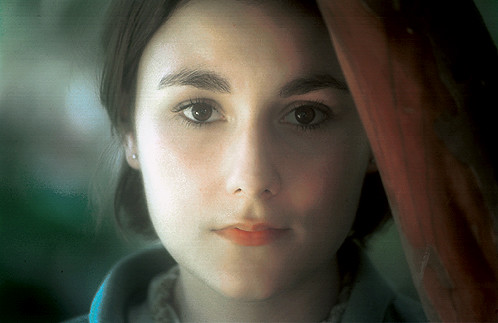
45° side lighting, which is found outdoors both early and late in the day, creates strong contrast in your photographs, and can bring out subtle texture and form which would not be seen with direct front lighting. It is also considered by many to be the best lighting for portraiture.
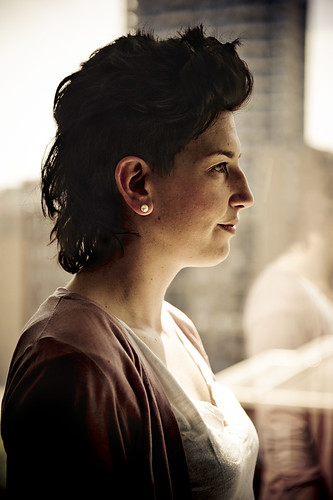
90° side lighting creates rather dramatic contrast, with long shadows. This angle of light is often referred to as “texture lighting”. 90° side lighting is great for emphasizing subjects such as the bark of a tree, or a deeply wrinkled face.
Backlighting is when the light is coming from behind the subject, and directly at the camera. Exposing for the light turns your subject into a dark silhouette. Bumping up the exposure can render some details in your subject, but still preserve the stark contrast between subject and background.
Top lighting occurs when the sun is directly overhead, which is generally between 10am and 2pm. It’s not a flattering light for most photography. Portraits taken with top lighting for instance, will often have deep shadows around the eyes and under the nose.

3. Color – The color of light varies according to its source, and the substances which it may pass through, such as a filter. The color of incandescent light, for example, is different than the color of sunlight. Even sunlight will vary in color with changes in atmospheric conditions, and time of day.
Digital cameras typically allow for adjusting of white balance to suit the color of light, although most will do a pretty good job of adjusting the white balance for you, under most conditions, in “auto” mode.
4. Quality – The quality of light is its amount of diffusion. “Hard” light will have high contrast and produce sharply defined shadows, whereas “soft” light will be diffused and produce soft shadows or no shadows at all. For example, afternoon sunlight on a bright, cloudless day is “hard” light, and sunlight on an overcast day is “soft”.
One way to take a flattering portrait outdoors on a brightly lit day is to use a reflector. A reflector can be made at home with a large piece of white cardboard or poster board. You can also purchase a commercial reflector dish from camera stores, which come in several sizes. You will need to experiment to find the correct position to hold the reflector prior to taking your shot. Typically anything more than two feet away might not provide enough light to fill the shadows.
Another way to take a flattering portrait outdoors, is to wait for an overcast day. The sunlight will be diffuse or “soft” in this case, and will eliminate harsh, unflattering shadows.