Photomatix Essentials (Formerly Photomatix Light) – Tutorial And Review
You will get an instant 15% discount on your purchase of Photomatix Light, or any other Photomatix product, by entering the following coupon code into the order form: photoluminary
Welcome to my Photomatix Esentials (Light) tutorial and review.
While I would always first recommend Photomatix Pro to any photographer that is serious about professional HDR photography results, Photomatix Light is great for newcomers to HDR or digital photography. It’s also great for those on a tight budget, as it’s a full $60 cheaper than the Pro version of the software. Like the Pro version, you can download a free and fully functional trial version of Photomatix Light, which will never expire, but does leave watermarks on saved images. I am writing this review and tutorial with my Windows 7 computer, but the process is basically the same on a Mac.
Download Windows trial of Photomatix Esentials from HDRsoft.com
Download Mac trial of Photomatix Essentials from HDRsoft.com
You can also download sample bracketed images from the above download pages on HDRsoft.com. For the sake of this tutorial I will be using the Lighthouse sample photos located on the download page for the software.
I would suggest also reading my comprehensive HDR tutorial, which describes in detail what an HDR image is, how to bracket exposures. It also goes through a step by step process of creating an HDR image using Photomatix Pro version 4.0.2. If you are considering trying Photomatix Pro instead, it might be a good starting point.
Your first step, after downloading and installing the trial version is to open the software. If you have purchased a license, you can enter your license key, or you can choose to continue with the trial. Once you have finished with this step, the following window will appear:
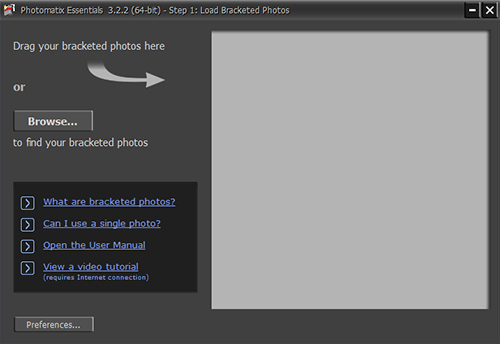 Opening Screen Photomatix Essentials
Click the “Browse” button and choose your bracketed exposures:
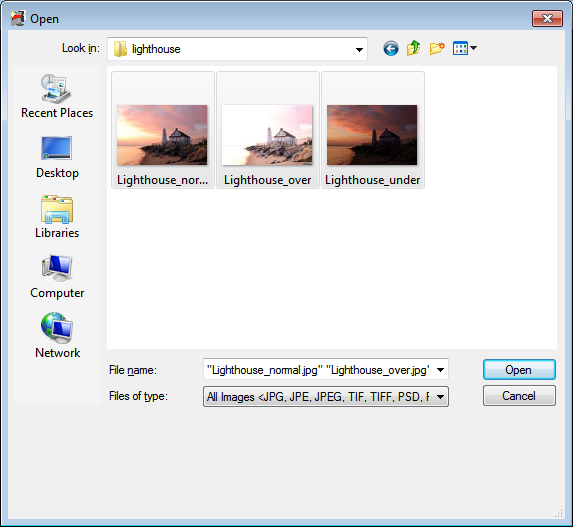 Opening Bracketed Exposures
Once you have chosen and opened your bracketed exposures, you will see the following screen, and you can then click the “Next…” button:
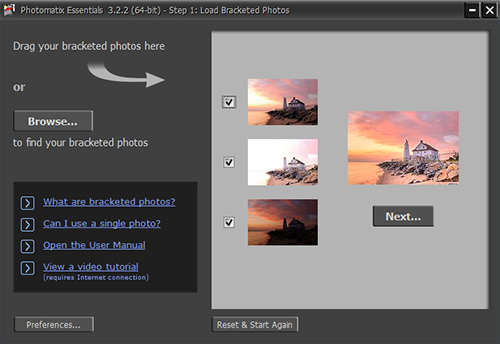 Three Exposures Ready to be Edited in Photomatix Essentials
After you click the “Next” button, the following window will pop up. Choose which option applies to your image:
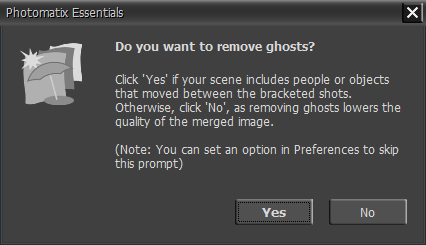 Remove Ghosting Window
For the sake of this tutorial/review I will go over the Details Enhancer tone mapping method, which is the most commonly used. Here is what the combined Lighthouse exposures look like in the Details Enhancer tone mapping menu, at the “Default” setting:
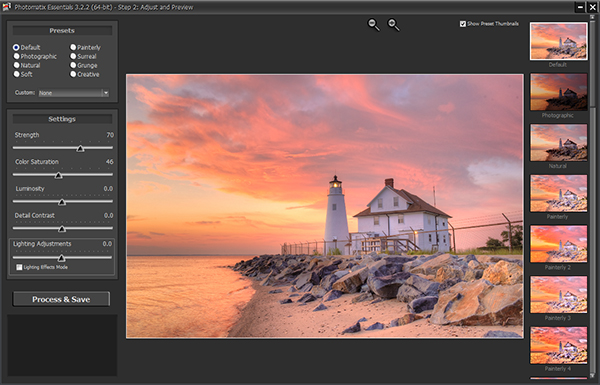 Combined Exposures – Default Settings Photomatix Essentials
The preset thumbnail panel on the right, shows you small previews of the built in presets. You can click them for an instant change and either leave the results as-is or make further slider adjustments:
 Preset Thumbnails
The tone mapping settings I have chosen for this HDR image are:
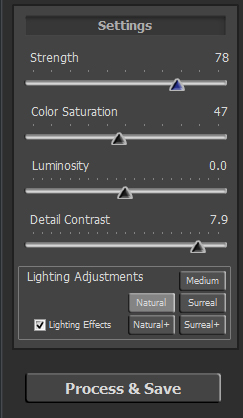 Chosen Tone Mapping Settings
Strength = Controls the strength of the contrast enhancements. 100 gives the maximum increase in both local and global contrast enhancements.
Color Saturation = Controls the saturation of the RGB color channels. Moving the slider all the way to the left produces a gray scale image and moving the slider to the right increases saturation.
Luminosity = Controls the compression of the tonal range. Moving the slider to the right boosts shadow detail and brightens the image. Moving it to the left can create a more naturalistic result.
Detail Contrast = Sets how much local details are amplified. Moving the slider to the right gives a sharper look.
Lighting Adjustments = Either Lighting Effects mode or the slider mode. Lighting Effects mode tends to give more surrealistic results. In either mode, higher values have a more natural look and lower values tend to have a more artificial look.
Here is the tone mapping menu, showing my chosen settings, and the preview of the Lighthouse image:
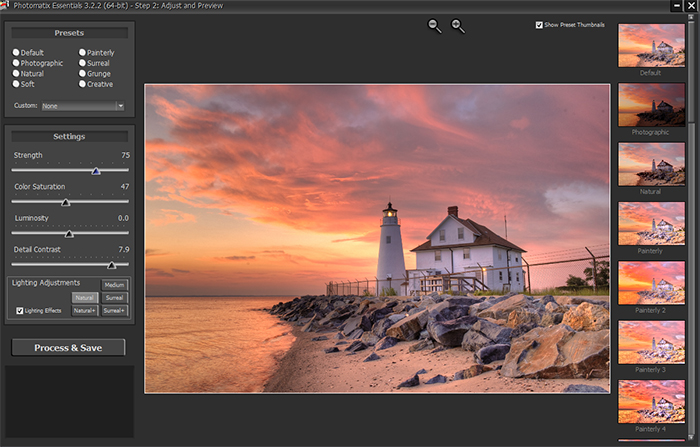 Ready for Processing
At this point you will want to click the “Process & Save” button. You will prompted to decide if you want to apply noise reduction prior to processing. If you are using RAW files, it is a good idea to say yes. I chose no for this image, since the source images were JPEGs.
Here is my final processed and saved result:


