Photomatix Pro – Exposure Fusion Tutorial
If you decide to purchase any Photomatix product, you will get an instant 15% discount by entering the following coupon code on the order form: photoluminary
Also, please see my more comprehensive Photomatix Pro HDR tutorial, which explains in detail how to bracket exposures.
Prior to getting started on the tutorial, I want to explain what Exposure Fusion really is. Exposure Fusion is not technically HDR. Rather, it is the combining of bracketed images into a low dynamic range image, with the intention of creating an image with a more “natural” result.
Photomatix Pro basically “decides” what the best tonalities are in each image within the bracketed set, and then combines them to create an single image.
In addition to the obvious advantage of creating a more naturalistic scene, Exposure Fusion doesn’t have the problem with halos that HDR has.
Personally, I don’t prefer using Exposure Fusion for my images, as I’m not generally after a more natural result. However, this is not going to be true for everybody, for a variety of reasons.
If you don’t yet have Photomatix Pro, you can download the fully functional trial version of the software, from here:
http://www.hdrsoft.com/download.html
The trial version will never expire, but does leave watermarks on saved images.
Once you have Photomatix Pro installed, you will then need to open the software, and click the “Load Bracketed Exposures” button. Choose your bracketed exposures and click “OK”. For the purpose of this tutorial, I am using sample images which can be downloaded from HDRsoft.
Next, choose your preprocessing options (see HDR tutorial), and click “OK”:
 Preprocessing Options
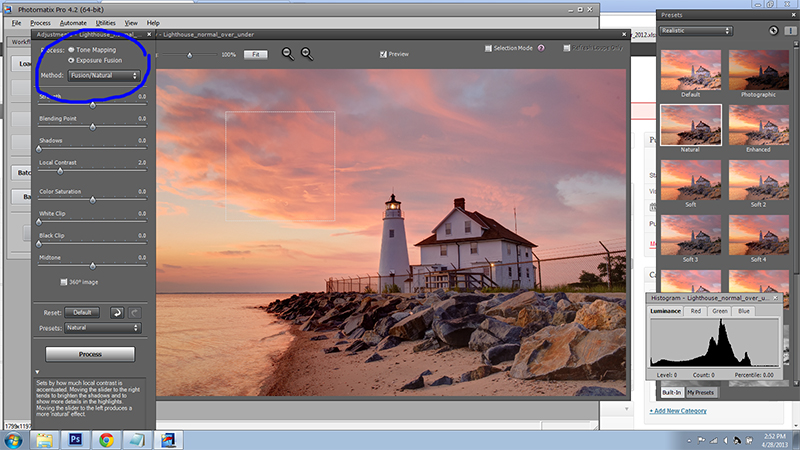
You will now have the option to choose “Exposure Fusion”, in the upper left corner of the screen:
 Exposure Fusion Screenshot
In the drop-down menu for “Method”, you can choose which Exposure Fusion method to process your image. Here are explanations of each of the processing methods.
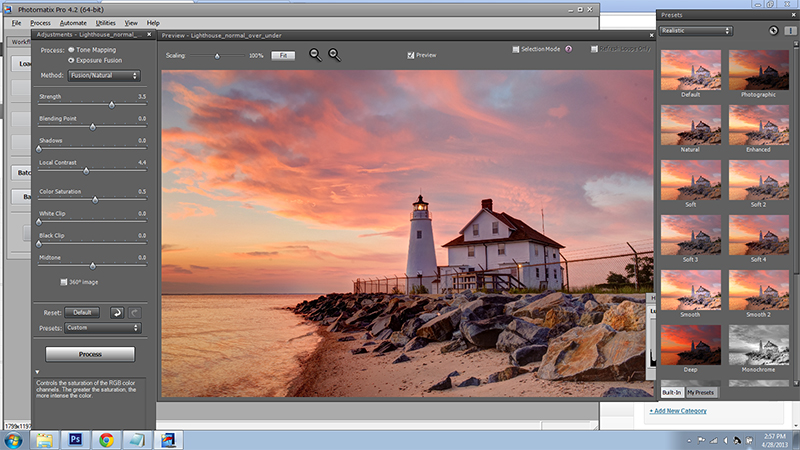
I chose the Fusion/Natural option and then adjusted a few sliders until the image was exactly to my liking. Here it is ready to process with my chosen settings:
 Exposure Fusion Ready to Process
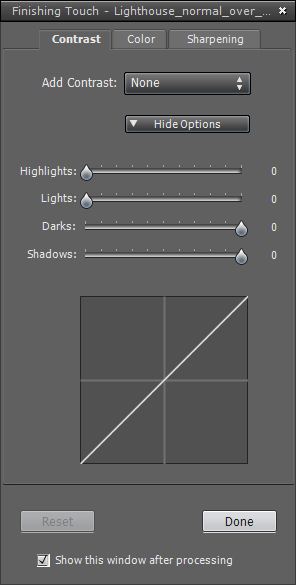
Click the “Process” button and the software will do its thing. Then, the “Finishing Touches” menu will pop up. You can use this menu to fine tune your final image prior to saving it.
 Finishing Touches Menu
Here is the final processed and saved result in Exposure Fusion:
 Final Saved Exposure Fusion Image
I hope that this tutorial has helped you to use Exposure Fusion in Photomatix Pro.


One Response to Photomatix Pro – Exposure Fusion Tutorial