Lightroom Photomatix Plug-In
To get an automatic 15% discount on the purchase of any Photomatix product, enter the coupon code photoluminary into the order form.
Photomatix Pro, made by HDRsoft, comes with a free Lightroom Export Plug-In. This plug-in is an export only plug-in, which can make your work-flow faster, especially when you have multiple sets of bracketed images to process.
To get this plug-in, you would first need to download Photomatix Pro from the HDRsoft website. If you already have a license for Photomatix Pro, but would like to start using the plug-in, then you can simply re-download Photomatix Pro again. If you have never tried Photomatix Pro, you can download a free and fully functional trial version from the HDRsoft website. This trial version will never expire, but it does leave watermarks on saved images. If you later decide to purchase a license for Photomatix Pro, you can actually run images which were previously processed in Photomatix Pro, back through the software, which will remove the watermarks. This will only work if the images have received no post-processing of any sort.
There are installation instructions for both the Windows and Mac versions of the free Lightroom plug-in, here on the HDRsoft website:
http://www.hdrsoft.com/download/lrplugin.html
Once you have the Photomatix Lightroom Plug-In installed, you will need to first import and then select the exposures that you would like to export into Photomatix Pro. The plug-in is intended to export bracketed exposures from Lightroom into Photomatix Pro, and is not intended to actually process an HDR image. The three bracketed photos used in this tutorial can be downloaded from the HDRsoft website.
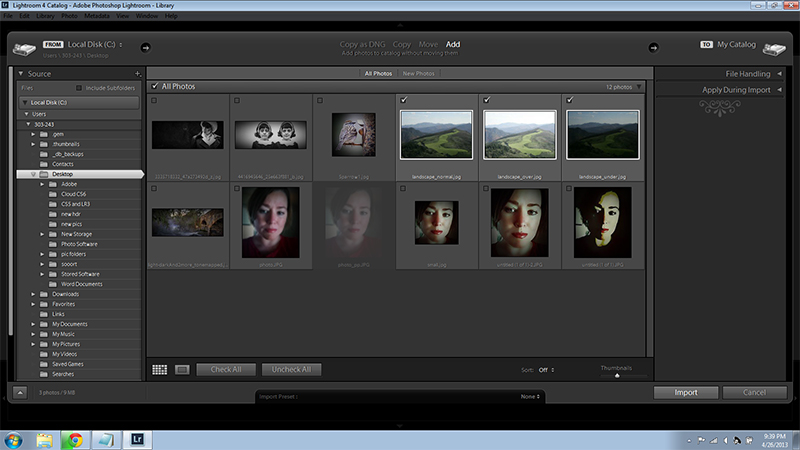 Import photos Lightroom Screenshot
You can select the exposures with the filmstrip at the bottom of the Lightroom window or with the grid.
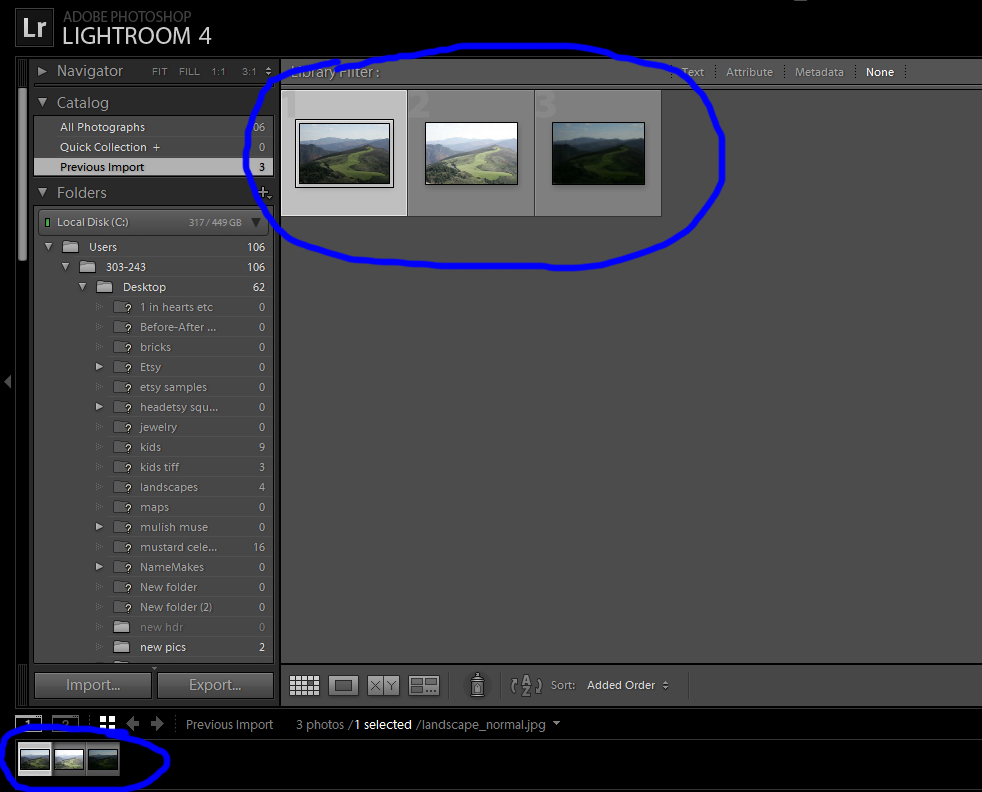 Select Photos to Export to Photomatix Plugin in Lightroom
Then go to File > Plug-in Extras > Export To Photomatix Pro. You can also right click on the selected thumbnails and choose Export > Photomatix Pro.
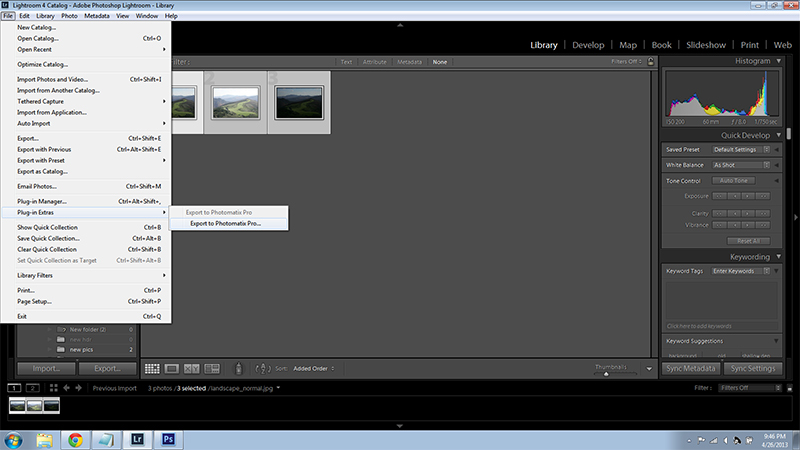 Export to Photomatix Pro
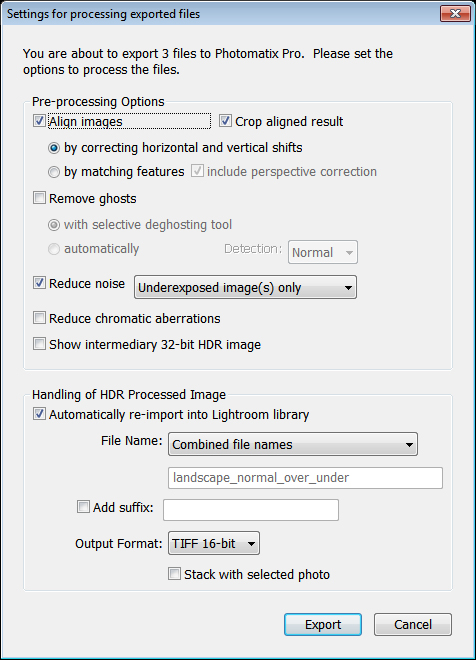
The “Settings For Processing Exported Files” window will pop up. These are the settings I have chosen for this particular set of bracketed photos:
Notice that you can choose to check the box to automatically re-import the processed image back into Lightroom. Click “Export” once you have chosen your desired settings.
Photomatix Pro will automatically open up and open your merged result with the default tone mapping menu, “Details Enhancer” with the “Default” settings, or your last used settings, depending on how you have your preferences set. Here is the demo image in “Details Enhancer” with the “Default”settings:
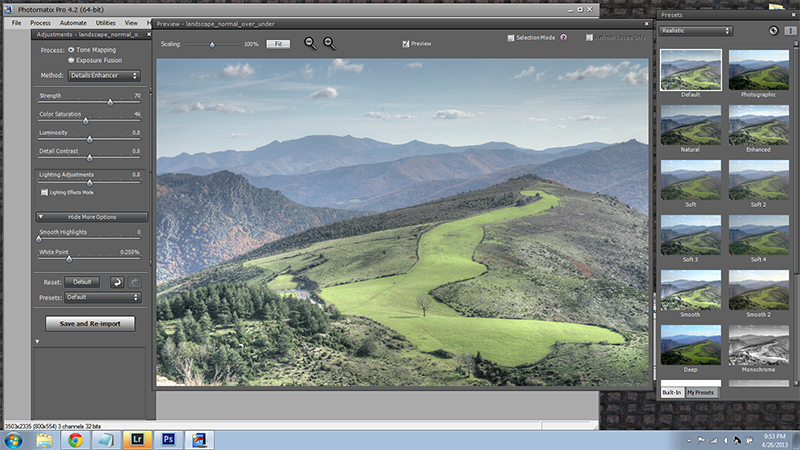 Default Photomatix Details Enhancer Settings
Once you have made your desired toner mapping selections click on the “Save and Re-import” button in the lower left hand corner of the screen. Here is the demo HDR image with my desired settings, just prior to clicking the “Save and Re-import” button:
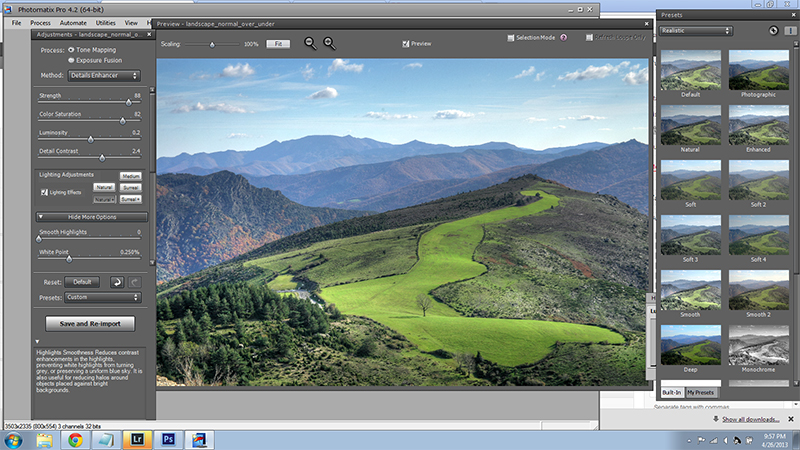 Settings Chosen Prior to Processing
Here is the final result of the image processed in Photomatix Pro, and then automatically re-imported back into Lightroom:
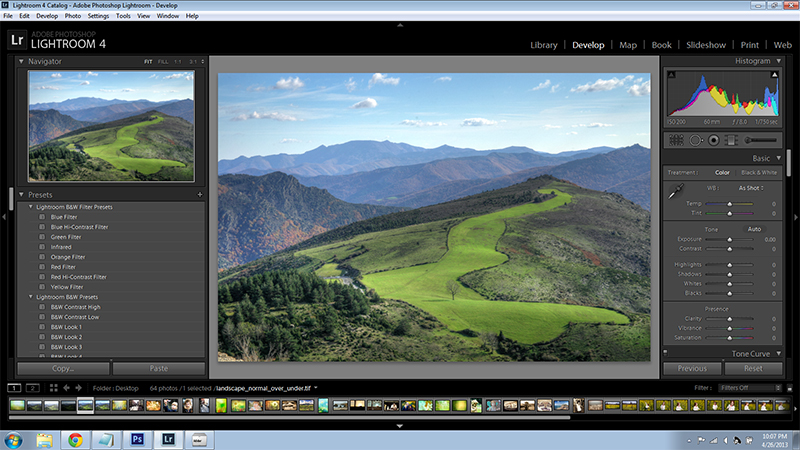 Imported Back Into Lightroom
You can then make adjustments in Lightroom to your processed HDR image, if desired.
Here is my final result after making some Lightroom adjustments:
 Landscape Processed in Lightroom after Photomatix
View my complete Photomatix Pro Version 4.0 HDR Tutorial!

